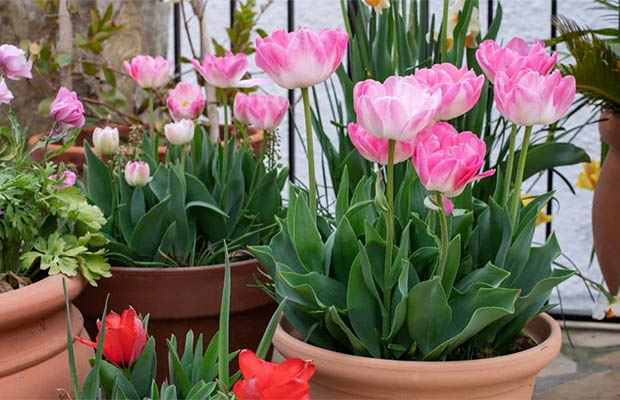
Do you adore the springtime appearance of tulips in pots? These detailed instructions will help you grow your own springtime blooms.
You’ve seen stunning images of potted flowering bulbs fill your social feeds every spring, but have you ever wondered how to plant tulip bulbs in pots?
Success when planting tulip bulbs in pots depends on selecting the right planter, premium potting soil, and tulip variety, as well as the right time for planting and chilling.
For gorgeous tulips, daffodils, fragrant hyacinths, and more to grace your patio in the spring, follow this easy advice this fall.
Table of Contents
What’s the Advantage of Growing Bulbs in Pots?
The best option for you may be to plant bulbs in pots if your garden is small, you have to deal with ravenous squirrels or voles, or your soil is heavy clay. In the spring, you can place your containers wherever you want a splash of color, whether it’s outside your kitchen window or right next to your front door.
Lightly textured potting soil keeps the bulbs from retaining too much moisture and rotting, and sturdy clay, fiberglass, or metal pots prevent varmints from digging in and devouring your bulbs.
What Kinds of Bulbs Will Grow in Pots?
Any type of spring-blooming bulb will thrive in a container, but tulips, tiny daffodils, fragrant hyacinths, muscari, and crocuses are among the simplest. In the early fall, garden centers have them all in stock. If you choose to purchase bulbs through the mail, you must order well in advance since mail-order bulb companies start accepting orders in early summer for fall shipping.
One type of bulb per pot is the simplest, most secure way to plant bulbs in containers. Use one pot for your miniature daffodils, another for your red tulips, and a third for your purple crocuses.
You could try a more complex planting with layered bulbs of different types in a single large container once you’ve mastered growing bulbs in containers. Replanting your individual bulbs in single pots into a single large combination planter in the spring is an even simpler way to achieve that look. Since it is always guaranteed to be effective, that method is one that many professional gardeners prefer.

How to Plant Bulbs in a Pot in Six Easy Steps
To begin, gather some fresh potting soil and a clean, dry container. Then follow these six steps:
- At least two inches of potting soil should be placed at the bottom of your container.
- With the pointy end facing up, place your largest bulbs in the pot. Embrace them so they sit upright and won’t topple over when you add more soil. But don’t let them touch, place them close together.
- If you’re layering different types of bulbs in a big pot, start with the biggest ones at the bottom and add smaller ones one after the other. In order to give their roots room to expand, leave about an inch of soil between each layer.
- More soil should be added until it is about a half inch below the pot’s lip. For when you water, this creates room.
- Give your newly potted bulbs plenty of water.
- To deter any curious creatures, top-dress the pot with a granular animal repellent like Plantskydd.
Do I Need to Chill My Flower Bulbs before I Plant Them?
Your location will determine the answer. If you live somewhere with a cold climate—typically the U.S. Department of Agriculture Plant Hardiness Zones 7a or colder — you may be unfamiliar with “chilling” your bulbs, because Mother Nature takes care of the work. But if you live where the winters are short and mild, you’ll need to conjure up a “winter” so your bulbs will bloom properly the following spring.
You can place an order for spring-blooming bulbs to arrive in the early fall in USDA Zones 7b and higher. Before planting, you’ll need to give them enough time to be exposed to temperatures ranging from 35 to 45 degrees Fahrenheit for 10 to 16 weeks. For chilling your bulbs, a spare refrigerator works great. Fruits and vegetables shouldn’t be kept together though. Produce that is ripening releases ethylene gas, which could harm flower bulbs.
What Kind of Pot Should I Plant My Bulbs In?
The most crucial feature of the pot you select is that it must have at least one drainage hole in the bottom. In moist soil, bulbs can rot very quickly. That’s probably the reason if your bulbs malfunction.
You should space your potted bulbs much closer together but at the same depth as you would in the ground. To plant a two-inch-tall tulip bulb, place it four to six inches deep, or two to three times as deep as its height. For your largest bulbs, pick a pot that is deep enough.
Choose a pot that can withstand the winter elements if you intend to keep your potted bulbs somewhere dry over the winter. Choose a pot made of a more durable material, such as concrete or cast iron, if keeping it indoors is your only option.
What Should I Do With My Potted Bulbs over the Winter?
After all of your bulbs have been potted and are well-watered, choose a protected area, such as a shed or an unheated garage, to keep them over the winter.
It’s crucial to keep them cold while protecting them from winter rains or snow that could soak the soil and cause the bulbs to rot. Through the winter, the soil should only be very lightly moist. Set out bait for mice and voles, which will gladly eat your bulbs if they aren’t protected.
Take your potted bulbs out of storage once it gets warm enough in the spring and allow them to grow naturally outside. To allow water to drain freely and avoid rot, use pot feet if you are placing them on a hard surface.
Look, it was simpler than you imagined! It’s time to start thinking about the types of bulbs you’ll try in the upcoming season.
You May Also Like: How To Propagate Geraniums?
Tips to Plant Your Spring Bulbs in Pots
- For a full and dramatic display, plant your bulbs so that they are almost cheek to cheek.
- The flat side of tulip bulbs should face outward when planting them in pots because this is where the first leaf will appear and will soften the pot’s edge.
- Put the tallest and most recently flowering varieties toward the bottom of the pot if you are layering your bulbs. Be sure to completely cover the top layer of spring bulbs before adding more potting soil. You can add a third or fourth layer if your pot is deep enough by repeating the procedure above.
- Before the bulbs start to grow, plant some annuals to add some extra color and cover the soil.
- Add some fertiliser once the flowers begin to fade, and keep your pot watered until the foliage begins to yellow. The bulbs are getting ready to rest for the coming season.
Read More: How Big Do Succulents Get?
FAQs
When Should Tulips Be Planted in Pots?
Plant tulip bulbs in containers in late October, November and December. Make sure your pot has good drainage and use high-quality, peat-free compost. It’s best to layer bulbs in what the Dutch refer to as a bulb lasagne, which is several layers of bulbs stacked on top of one another with compost in between, to achieve dense and flowery spring pot displays.
How Deep to Plant Tulip Bulbs in Pots?
It’s best to plant tulips in a hole at least 5″ deep.
Can You Leave Tulip Bulbs in Pots?
Thankfully, your bulbs will be just fine to stay in your flower pot after they begin to bloom.
Can I Plant Tulip Bulbs in Pots in the Spring?
Even if you missed the fall planting period, you can still plant bulbs in the spring that will flower in pots and containers.


